
(Some links on this post may be affiliate links, which help support me and help keep ads off here!)
One of the big advantages of a UGREEN NAS is that you’re not necessarily locked into UGOS. UGREEN’s x86-based NAS hardware can also run alternative operating systems, and in this guide, I’ll walk through installing OpenMediaVault (OMV) on the UGREEN DXP2800 while preserving the original UGOS installation.
If you’re more interested in TrueNAS, I’ve also covered running TrueNAS on the UGREEN DXP4800 Pro, which provides another option for turning UGREEN hardware into a more customizable NAS platform.
What We’re Working With
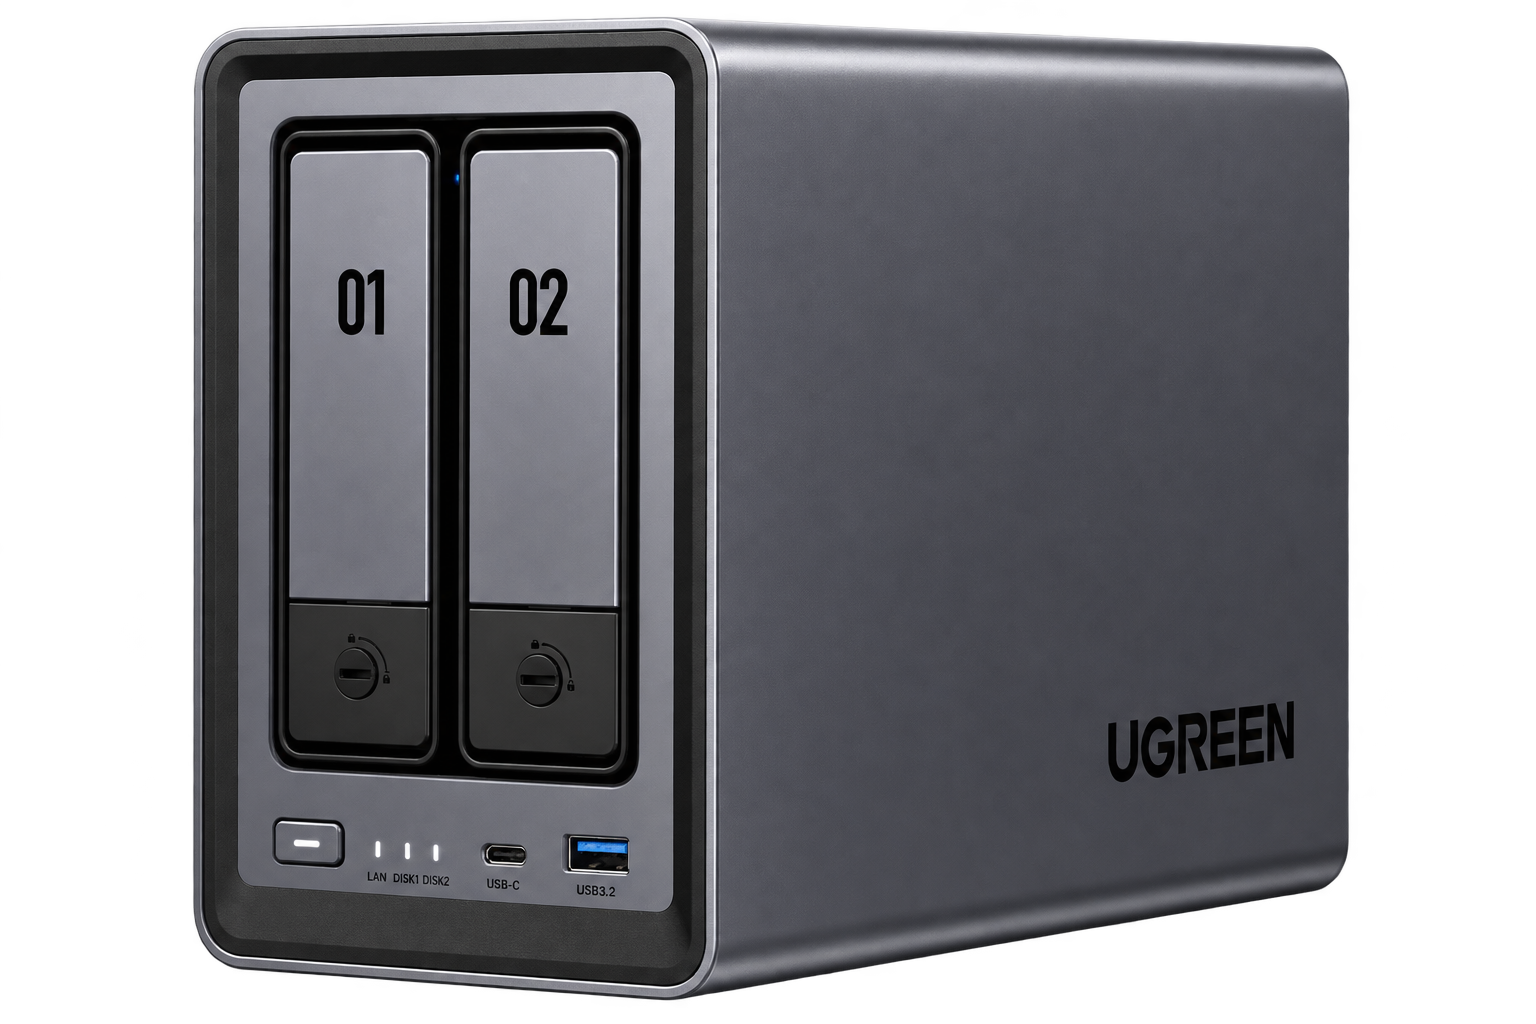
The UGREEN DXP2800 features an Intel N100 quad-core processor, 8GB of DDR5 memory, 2.5-Gigabit Ethernet, two M.2 NVMe slots, multiple USB ports, and HDMI output. For a compact two-bay NAS, there’s quite a bit of hardware to work with.
For this installation, I’m using two 2TB Seagate IronWolf hard drives for storage. I purchased the DXP2800 and both drives myself, and this project is not sponsored by UGREEN.
The DXP2800 ships with UGOS preinstalled on its internal 32GB eMMC storage. Because I want to preserve that installation, I’m installing OpenMediaVault onto a separate 256GB HP NVMe SSD instead of overwriting the internal eMMC. (Affiliate links are below which I may receive commission on)
Installing the NVMe Drive
Unlike some of UGREEN’s larger NAS models, the DXP2800’s two M.2 NVMe slots are located inside the drive bays rather than underneath the NAS. You’ll therefore need to remove the hard-drive trays to access them.
The NVMe drive slides into its M.2 connector at an angle and is secured with a convenient tool-free latch, so there’s no tiny M.2 screw to deal with. Once the NVMe is installed, the two hard drives can be seated in their trays and slid back into the NAS.
Downloading OpenMediaVault
The first step is to download the latest OpenMediaVault ISO. At the time of this guide, I’m using OpenMediaVault 8.3, based on Debian 13 “Trixie.”
Using the ISO is worth distinguishing from some other OMV installations. OpenMediaVault can also be installed on top of an existing Debian installation, which is a common approach on hardware such as a Raspberry Pi. In this case, however, we’re turning the DXP2800 into a dedicated OpenMediaVault NAS.
Installing from the ISO gives OMV direct control over the system’s storage, RAID configuration, networking, and other NAS functions, making it a clean and straightforward option for this build.
Creating the OpenMediaVault Installer
Once the ISO has downloaded, flash it to a USB drive using a tool such as balenaEtcher.
Connect the DXP2800 to a monitor using HDMI and attach a keyboard. You’ll also need to insert the USB drive containing the OpenMediaVault installer and connect the NAS to your network using Ethernet.
Power on the DXP2800. When the UGREEN splash screen appears, hold Control and repeatedly press F2 to enter the BIOS.
Disabling the UGREEN Watchdog
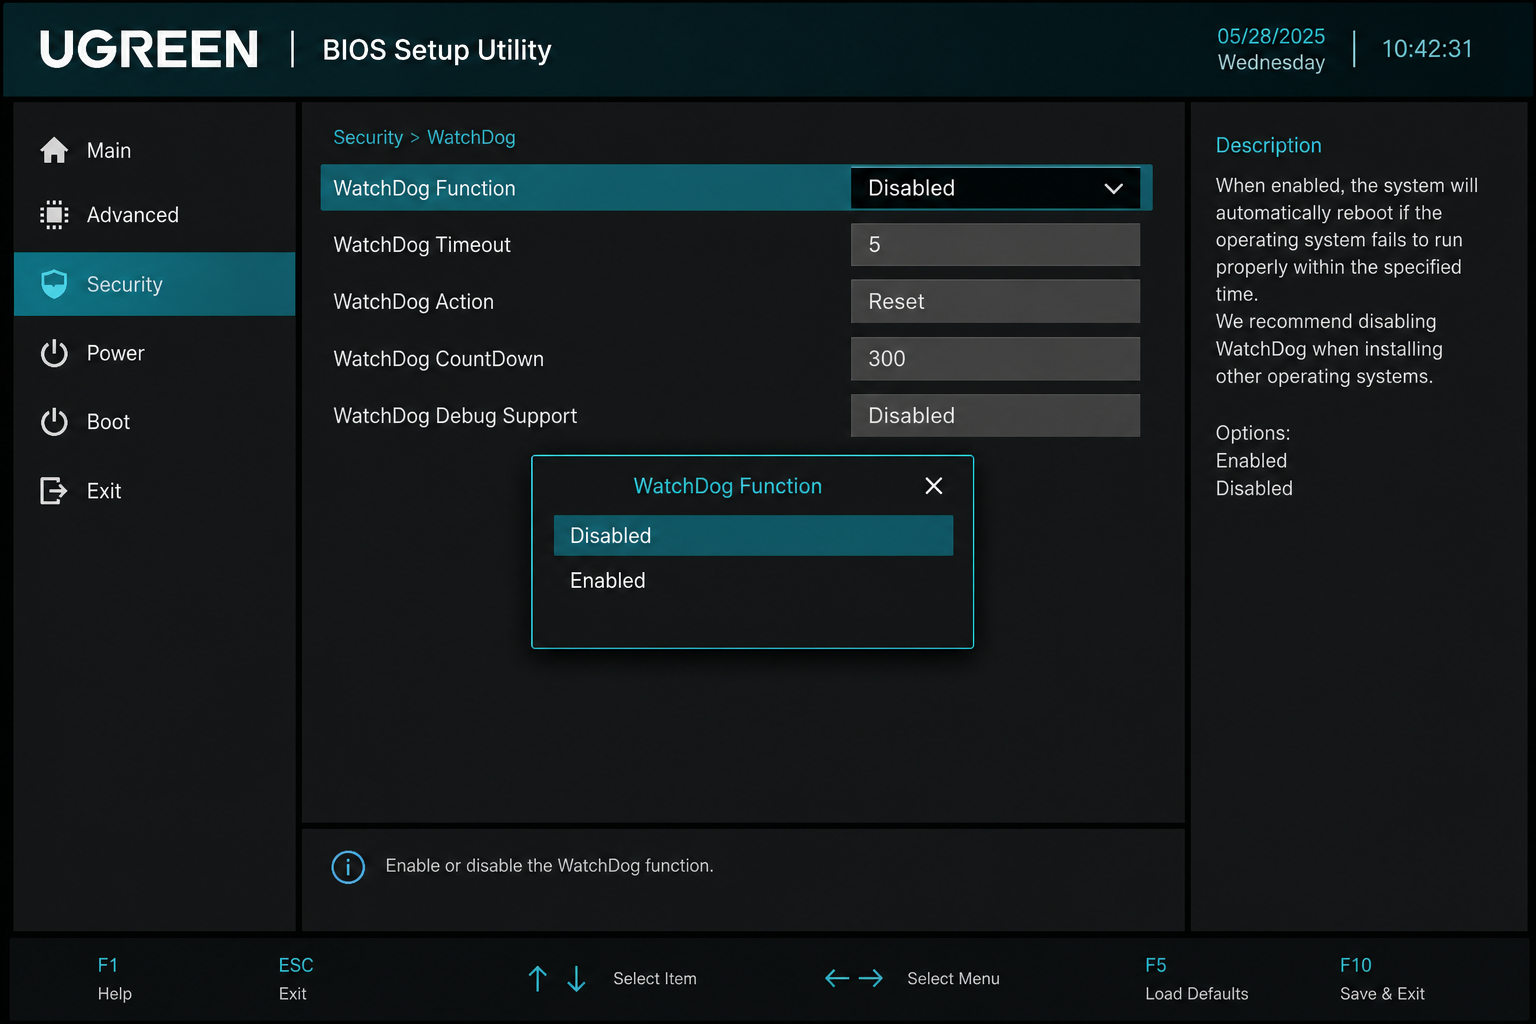
Before installing anything, we need to change an important BIOS setting.
UGREEN includes a ‘watchdog‘ function designed to automatically reboot the NAS if it doesn’t detect UGOS running after a few minutes. That’s useful when you’re actually running UGOS, but considerably less useful when you’re halfway through installing a completely different operating system.
Enter the BIOS settings and disable the watchdog before proceeding with the OpenMediaVault installation.
Identifying the Correct Boot Drive
Next, open the BIOS NVMe configuration and make sure you can clearly identify the drive you intend to use for OpenMediaVault.
In my case, the distinction is straightforward: my OpenMediaVault target is the 256GB HP NVMe SSD, while UGOS is installed on the NAS’s 32GB internal eMMC.
Make a note of which device is which. This becomes extremely important during installation because selecting the wrong target could erase your UGOS installation.
Next, confirm that the NAS is configured for UEFI boot mode, set the USB installer as the first boot device, save the BIOS changes, and reboot. When the OpenMediaVault installation menu appears, select Install.
Installing OpenMediaVault
The installer begins with the usual setup questions, including your location, preferred language, and keyboard layout.
You’ll then give the NAS a host name. This is the name that identifies the OpenMediaVault system on your network. I’m simply using openmediavault.
For the domain name, I’m using internal.
The installer will then ask you to create a password for the root account. It’s important to understand that this is the administrative password used when logging into the OpenMediaVault terminal or connecting through SSH. It is not the password for OMV’s web interface, which uses a separate admin account.
After setting your time zone, the installer may warn you that multiple drives have been detected. That’s expected in a NAS with several storage devices, so continue with the installation.
Forcing a UEFI Installation
You may encounter a somewhat intimidating prompt asking whether you want to force a UEFI installation. For this setup, select Yes.
This ensures that OpenMediaVault installs its boot-loader using the UEFI boot method we confirmed earlier in the UGREEN BIOS. That gives our target drive the appropriate UEFI boot files so the DXP2800 can recognize it as a bootable device.
Next, select the drive where OpenMediaVault will be installed. In my case, that’s the 256GB HP NVMe SSD.
Be especially careful at this step. The selected drive will be erased. Do not accidentally select the internal eMMC containing UGOS if you intend to preserve the original UGREEN operating system.
You may also encounter a screen asking for an HTTP proxy. I saw this when using the same installer on another computer but not when installing it on the UGREEN. Most home networks don’t require an HTTP proxy, so you can normally leave this field blank.
First Boot Into OpenMediaVault

Once installation finishes, remove the USB installer and reboot the NAS. Keep the monitor connected for the moment because we want to identify the IP address assigned to OpenMediaVault.
At the terminal login, enter root as the username followed by the root password you created during installation.
Normally, OMV displays its web interface IP address in the upper-left corner of the console. During my installation, however, Ethernet wasn’t detected when this screen initially appeared, and the displayed address didn’t automatically refresh.
If this happens, reconnect the Ethernet cable, wait a few seconds, and run either:
ip a
or:
ip -4 -br addr
This will display the NAS’s current network address. This appears to be more of a network-detection quirk than a normal part of installing OpenMediaVault.
Logging Into the OMV Web Interface
Enter the OpenMediaVault IP address into a web browser on another computer.
The default OMV web interface credentials are:
Username: admin
Password: openmediavault
The first thing I recommend doing is changing that default password. Click the profile icon in the upper-right corner, select Account, choose Password, and create a new administrative password.
Remember that this web-interface password is separate from the root password we created during installation.
Updating OpenMediaVault
Before configuring storage, it’s a good idea to install the latest system updates.
Navigate to System → Update Management → Updates and install the available updates. Depending on when you perform the installation, there may be quite a few.
Throughout OpenMediaVault, you’ll also periodically see a yellow confirmation banner after changing settings. Be sure to click Apply when it appears. Otherwise, your configuration changes may not actually be committed.
Installing Linux MD RAID Support
Beginning with OpenMediaVault 7, the traditional Linux software RAID controls were moved out of the main interface and into an official plugin. For a NAS operating system, I personally think RAID configuration could be a little more front and center—or at least offered during the initial setup—but fortunately, installing the plugin is easy.
Navigate to System → Plugins and search for MD or RAID. Locate the Linux MD plugin and install it.
If you prefer ZFS, that’s another option. The openmediavault-zfs plugin is available through OMV-Extras and provides ZFS storage pools with features such as mirrors and RAIDZ. ZFS is extremely powerful, but it also requires a little more setup.
For this two-drive NAS, I’m keeping things simple and using Linux MD to create a traditional RAID 1 mirror.
Creating the RAID 1 Array
After installing the MD plugin, navigate to Storage → Multiple Device, click the plus (+) button, and select Mirror.
Select both hard drives and save the configuration. OpenMediaVault will then begin building and synchronizing the RAID 1 array.
Normally, the next step would be creating a file system such as EXT4 or Btrfs. My drives were previously used together in the same RAID configuration for another project, so OMV detected their existing Btrfs file system and I didn’t need to create another one.
You also don’t necessarily have to wait for RAID synchronization to finish before creating a file system, mounting the array, or configuring shared folders. Synchronization can continue in the background, although the array does not have full redundancy until synchronization is complete.
Mounting the File System
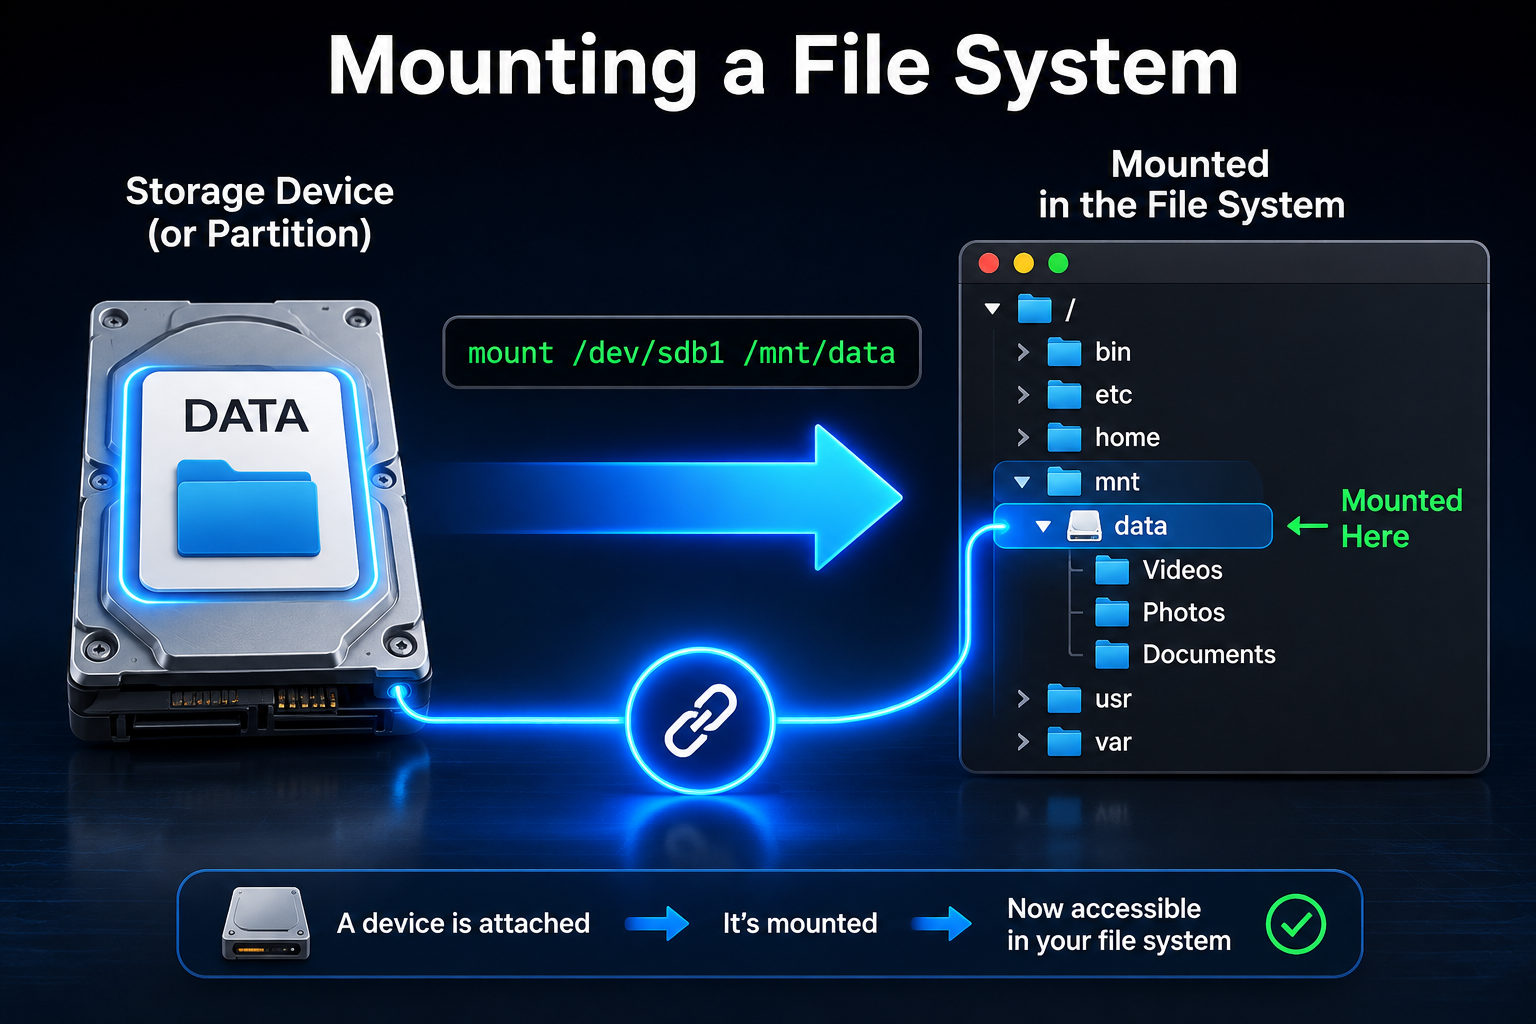
Once the file system is ready, use the Play/Mount button, select the appropriate file system, and click Save.
When the yellow confirmation banner appears, click Apply to commit the change.
Your RAID storage is now mounted and ready for OpenMediaVault to use. Next, create a user account for accessing the NAS.
Navigate to the user-management section, click the plus (+) button, and select Create. Enter the username and other requested information.
I’m also adding my user to the SSH group so the account can access the NAS remotely through a shell when needed.
Enabling SMB and Rsync
OpenMediaVault supports several network services, but two particularly useful ones are SMB/CIFS and rsync.
For rsync, navigate to Services → Rsync, enable the server, and leave the default port at 873 unless you have a particular reason to change it.
Next, navigate to Services → SMB/CIFS and enable SMB. SMB provides convenient network file sharing with Windows, macOS, Linux, and many other devices.
Creating a Shared Folder
With our storage mounted and services enabled, we can create a network share.
Navigate to Storage → Shared Folders, click Create, give the folder a descriptive name, and select your RAID storage. You can also change the relative folder path if you don’t want to use the default.
OpenMediaVault will display the default permissions for the folder. Administrators and users can typically read and write, while guests have more restricted access. Adjust these permissions as needed and save the configuration.
Testing the NAS From macOS
To verify everything is working, I’m connecting from a Mac.
Open Finder, select Network, and double-click openmediavault. Connect using the credentials for the user account created earlier.
Once connected to the shared folder, try creating a test directory and copying over a few files. If you can create folders and transfer files successfully, your OpenMediaVault NAS is officially up and running.
From here, you can create separate shares for backups, photos, videos, personal documents, or whatever else you want to store on your NAS.
Expanding OMV With Plugins
One of OpenMediaVault’s strengths is how much functionality can be added after the basic installation.
OMV-Extras provides access to an additional collection of community-maintained plugins. One of the most useful is the Compose plugin, which provides Docker and Docker Compose integration through OpenMediaVault. This opens the door to running self-hosted applications such as Jellyfin, Immich, Nextcloud, and many others.
The Backup plugin can help protect the OpenMediaVault system itself, while BorgBackup provides versioned, compressed, and encrypted backups of your data. There are also plugins for displaying CPU temperatures, adding two-factor authentication, and integrating ClamAV antivirus scanning.
These extras can turn a relatively straightforward file server into a much more capable self-hosting platform.
Automating Backups With Rsync
OpenMediaVault also lets you schedule commands and recurring jobs.
For example, you could configure an rsync job to copy one of your shared folders to an external USB drive every Sunday morning. The initial backup would copy the entire dataset, while subsequent runs would generally only need to transfer files that are new or have changed.
You could take this considerably further with scheduled network backups, BorgBackup, additional NAS targets, and other strategies.
Each of those topics could easily become a tutorial of its own, so for this guide, we’re sticking with getting the core NAS functionality working.
Is OpenMediaVault a Good Fit for a UGREEN NAS?
I think OpenMediaVault occupies a nice middle ground between UGOS and TrueNAS.
On one side, OMV is open source, highly customizable, and backed by a large community. It gives you considerably more freedom than a vendor-specific NAS operating system such as UGOS, although the experience isn’t always as turnkey or polished.
On the other side, OpenMediaVault can feel more approachable than TrueNAS. Its plugin architecture makes it relatively easy to add functionality as you need it, while TrueNAS provides more advanced storage capabilities out of the box, particularly around ZFS, snapshots, replication, and larger or more complex storage environments.
If you want something more flexible than UGOS without immediately jumping into the deeper end with TrueNAS, OpenMediaVault can be an excellent fit for UGREEN hardware—especially if you enjoy tinkering and want more control over how your NAS works.
If you’re new to UGREEN NAS, check out my post about why I switched from Synology NAS brand last year!
💻 Hardware I Used: ✅ Some links on this post may be affiliate links, which help support me and help keep ads off here!
- UGREEN DXP6800 Pro NAS: https://amzn.to/4tKmKoF
- UGREEN DXP2800 NAS: https://amzn.to/4qxKdcI
- 4 x 8TB Ironwolf HDD Used in DXP 6800 Pro: https://amzn.to/4diniNt
- 2 x 4TB Ironwolf HDD Used in DXP 2800 Pro: https://amzn.to/3UxOlxg