The State of Portable Monitors
Portable monitors designed specifically for the Raspberry Pi are surprisingly rare, and even fewer actually deliver a polished, all-in-one experience. Today, we’re taking a look at the Magex — or “Magix,” depending on how you pronounce it — Raspberry Pi monitor, a compact 10.1-inch display that aims to simplify Pi-based builds into a clean, self-contained setup.
Magex sent this unit over for review at no charge, but no money changed hands, they had no input on this content, and everything here reflects my honest experience using it.
*Some of the links in this post are affiliate links, which means I may earn a small commission if you purchase through them—at no additional cost to you.
Design and Features
At first glance, the Magex monitor presents itself as a very clean, desktop-like solution for Raspberry Pi users. It features a 10.1-inch IPS display with a 16:10 aspect ratio and a resolution of 1920×1200, giving you more vertical space than a traditional 1080p panel. The unit measures 9.64 by 6.3 inches and weighs about 2.77 pounds, making it compact but still substantial enough to feel solid on a desk.
In terms of hardware, the monitor includes dual rear-facing speakers, an active cooling fan, full-size HDMI, USB-C connectivity, and a 12V barrel jack for power. It also supports multi-touch input, has an adjustable kickstand, VESA mounting compatibility, and on-screen display (OSD) buttons for adjusting brightness, volume, and other settings.
Compatibility is another strong point. The Magex supports Raspberry Pi models 1 through 5, including the Pi Zero, as well as other single-board computers like Orange Pi and Banana Pi.
What’s Included in the Box
Inside the box, Magex includes everything you need to get started. You get the monitor itself, a 12V power adapter, USB-A to USB-C and USB-C to USB-C cables, mounting adapters for different boards, three plastic bracket pieces, and two USB touch cables.
One standout inclusion is the manual. It features detailed color diagrams for OSD controls, mounting instructions, and touch setup. In a time when many products rely on QR codes instead of documentation, this was a welcome addition.
Installation Experience
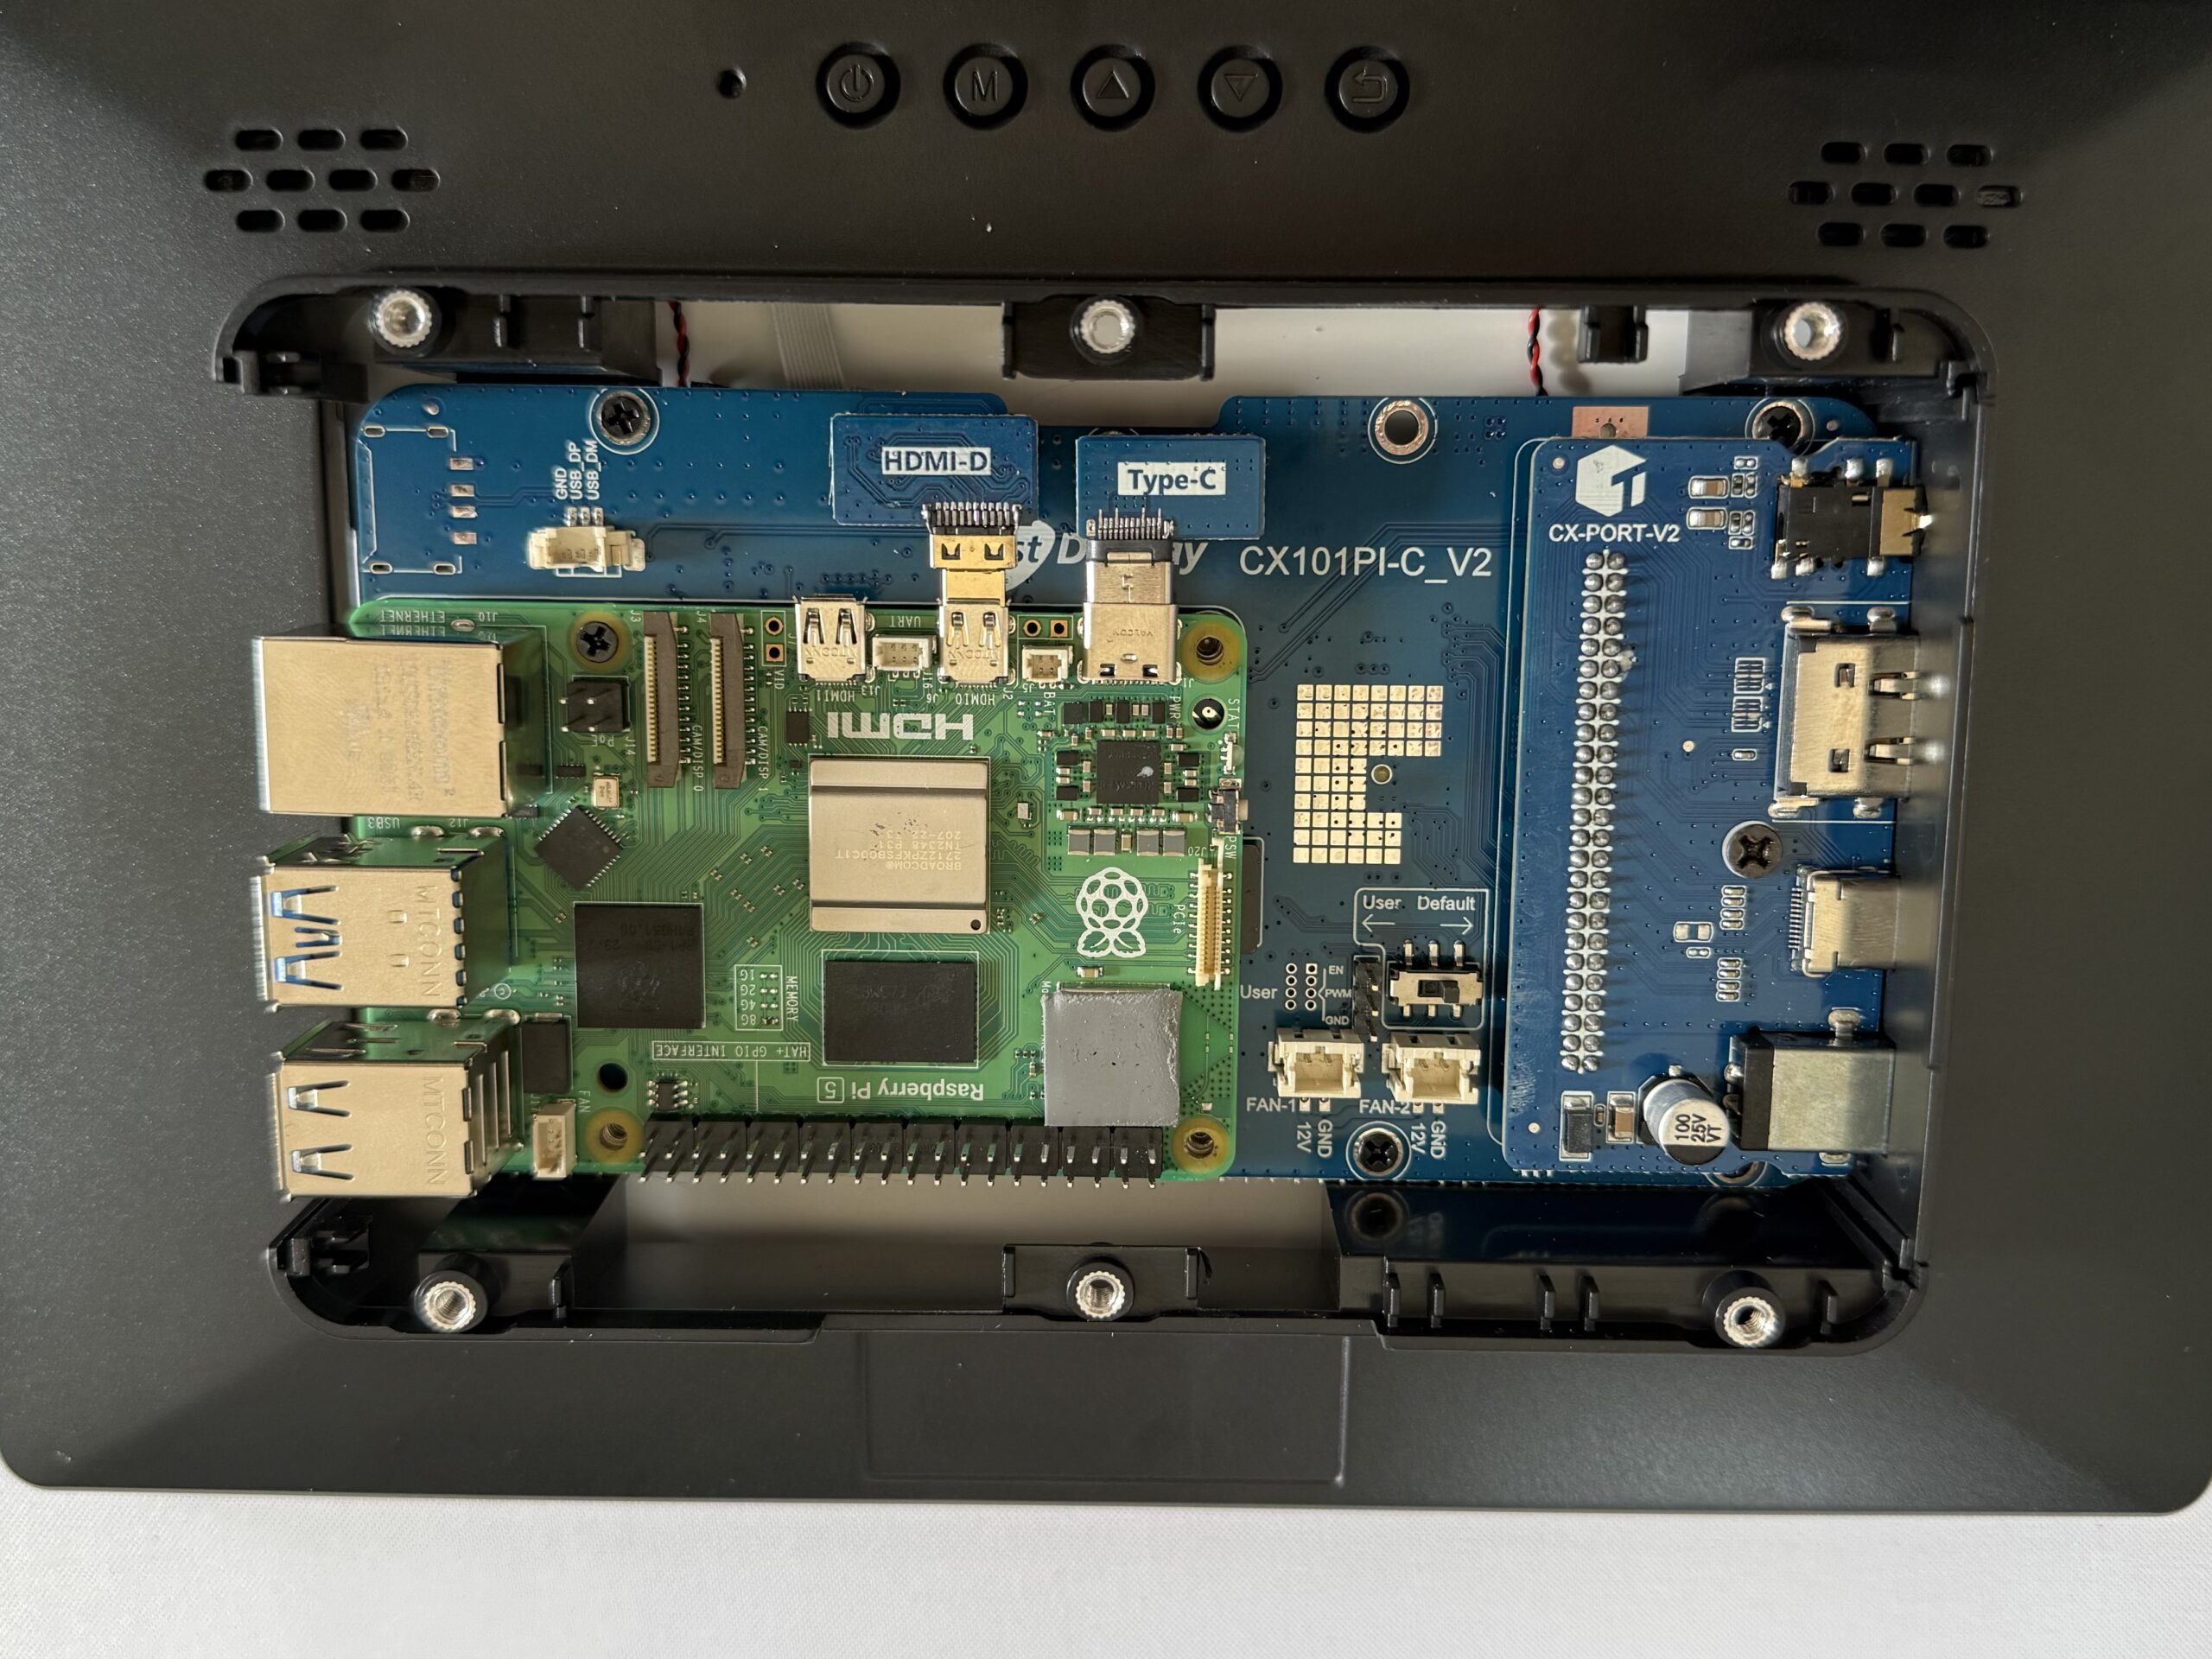
Installing the Raspberry Pi 5 into the monitor is straightforward in theory. You attach the included HDMI and USB-C adapters to the Pi, align them with the internal connectors, connect the fan and touch cable, secure the board with screws, and attach the plastic port bracket.
In practice, though, there is a small catch. Once the Pi is mounted, the board slightly overlaps the area where the bracket needs to slide in. That means you actually need to install the bracket first before securing the Pi. With everything in place, aligning the HDMI and USB-C adapters becomes a tight fit, so it does require a bit of patience.
Once everything is properly seated, the system powers on cleanly, and you’ll know it’s working when you see the familiar flashing green activity light.
Accessibility Limitations
One design trade-off becomes apparent after installation: accessing the microSD card is not convenient. Removing the Pi requires disassembling parts of the setup, including the bracket and connectors, which can easily take 20–25 minutes.
For users who frequently swap operating systems or experiment with different images, this can be a significant inconvenience. This monitor is clearly designed more for long-term setups rather than constant reconfiguration.
Backlight Control Options
The Magex includes a ‘USER/DEFAULT’ switch that controls how screen brightness is handled. In ‘DEFAULT’ mode, the monitor behaves like a standard display, managing brightness internally. In USER mode, brightness control is handed off to the Raspberry Pi, allowing for GPIO-style control using 3.3V signals.
This opens up possibilities for advanced use cases like automated dimming or custom brightness control. However, since GPIO access becomes limited once the Pi is mounted, this feature may not be practical for most users without additional planning.
Performance and Thermals
Out of the box, Raspberry Pi OS Bookworm booted without issue and automatically detected the display at its native resolution. General responsiveness was excellent, with smooth performance when navigating the desktop using a wireless keyboard and mouse.
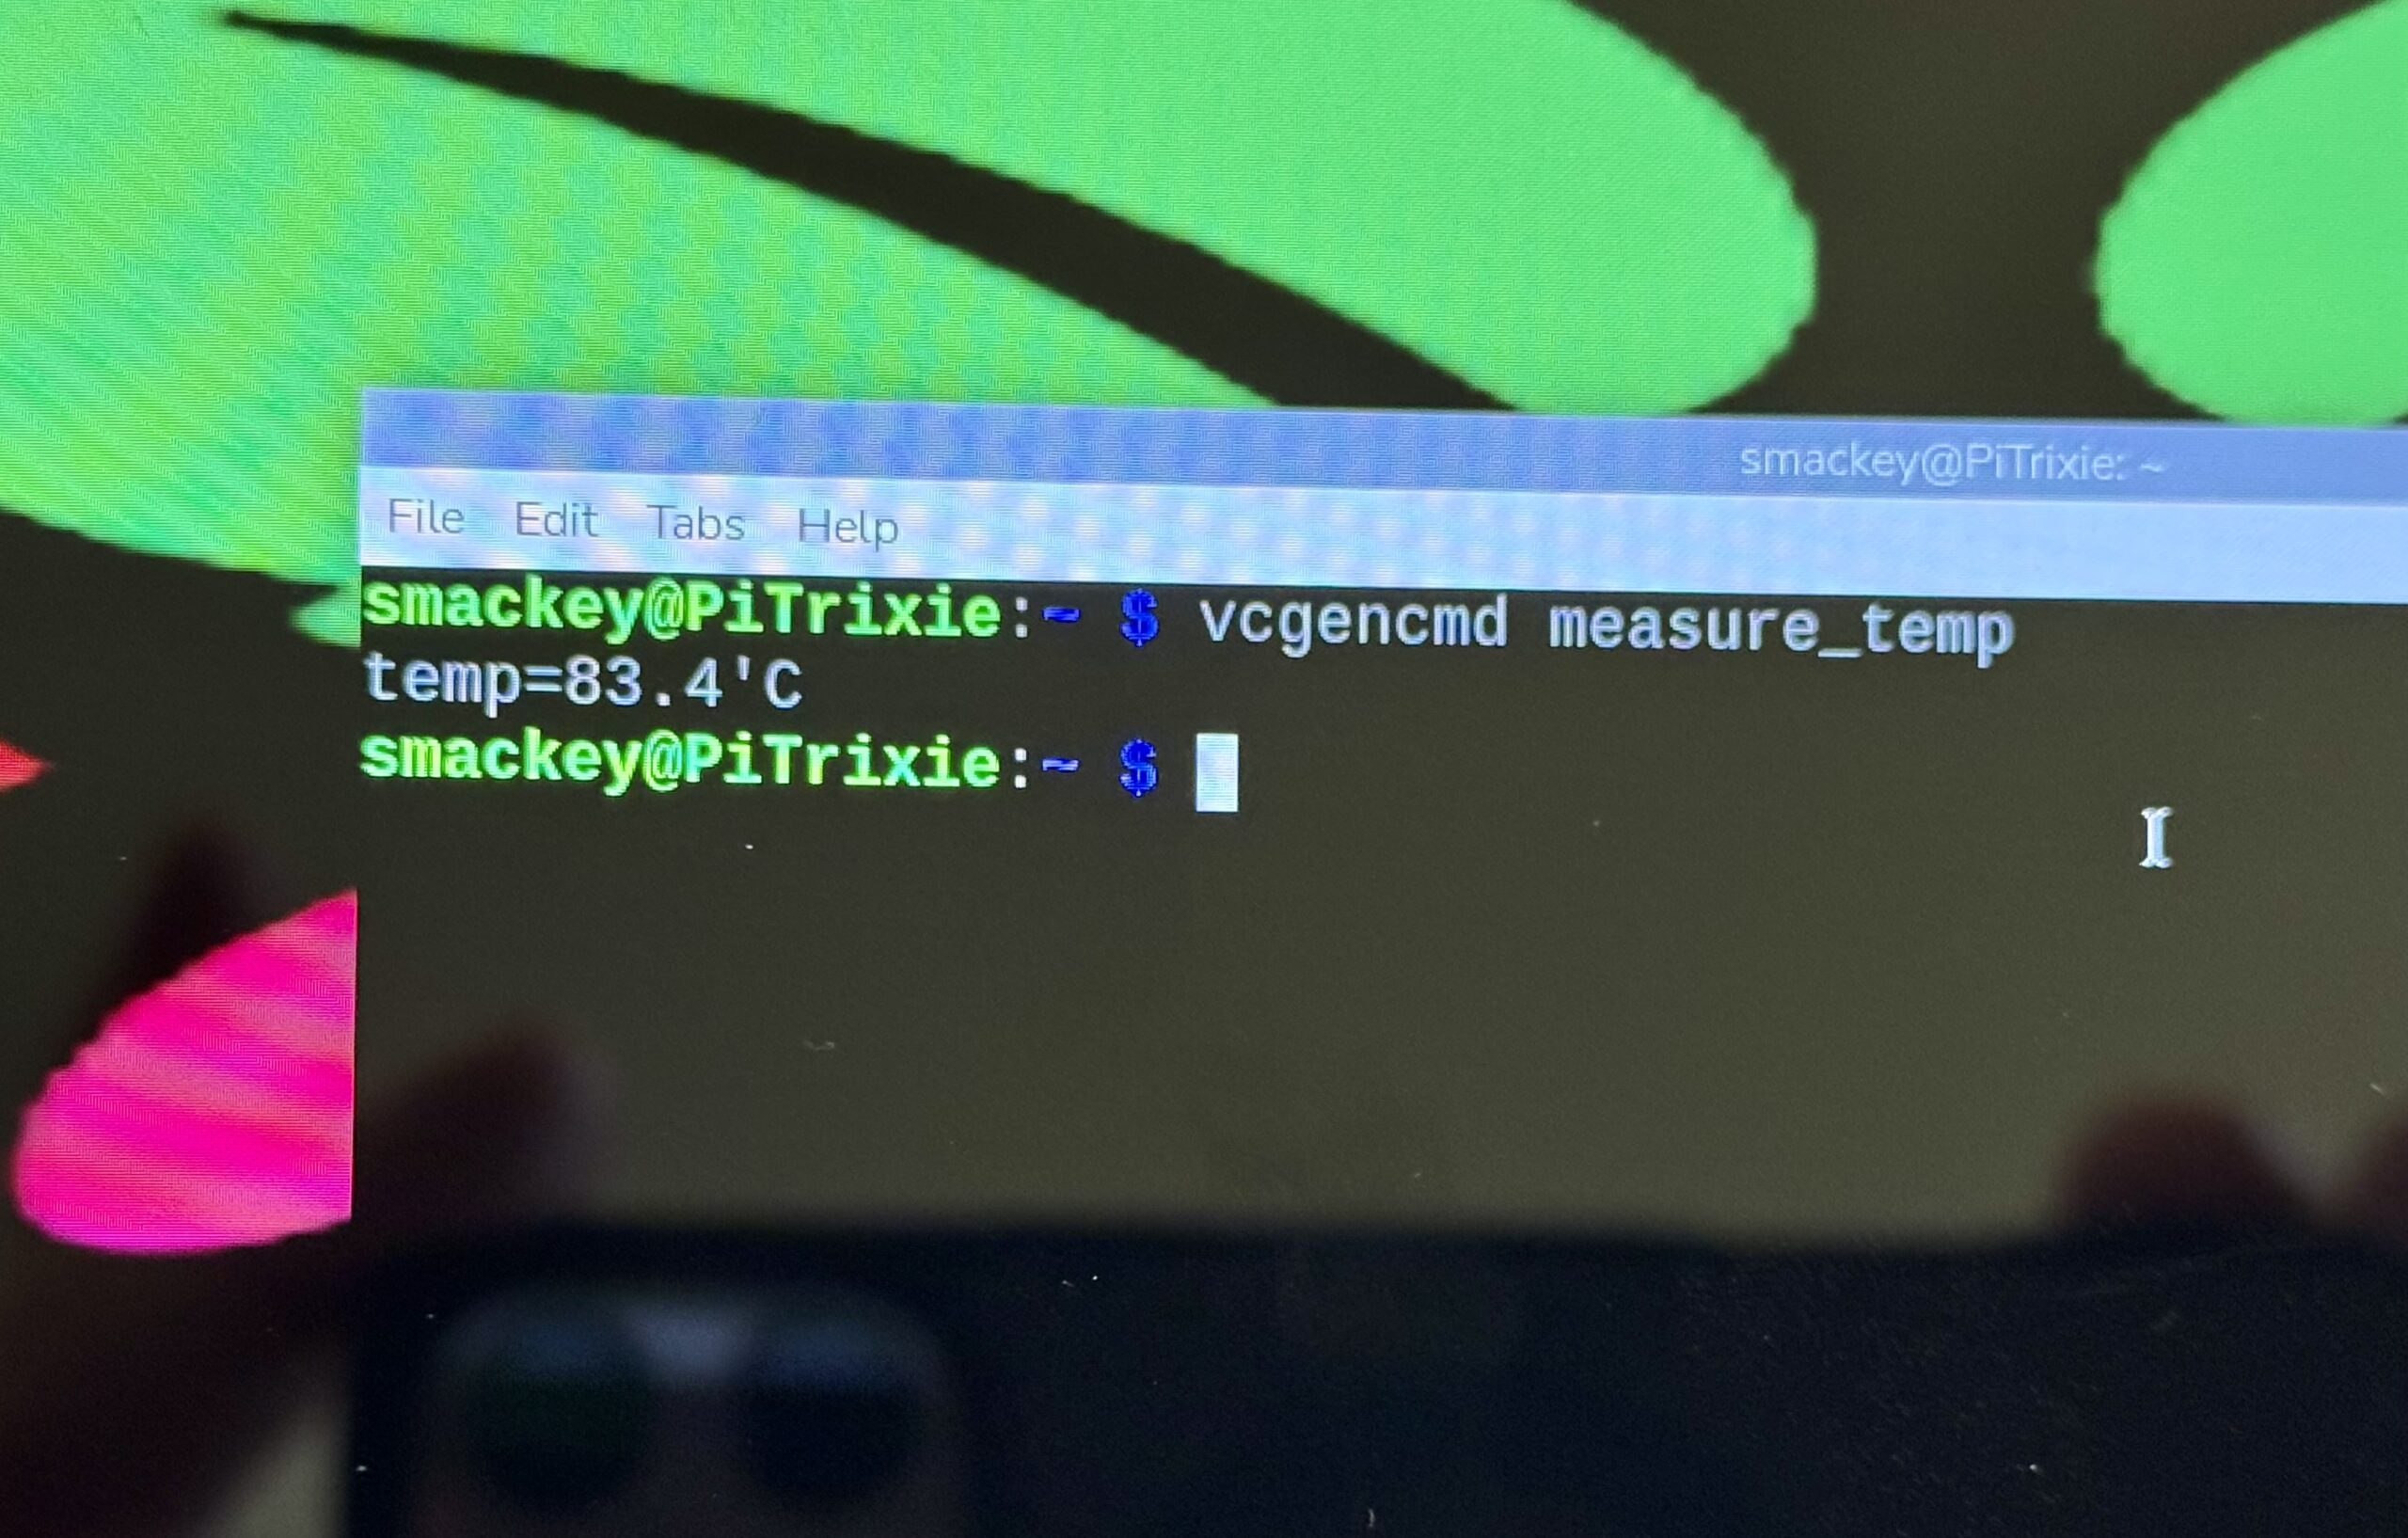
Thermal performance, however, depends heavily on cooling. With the fan disabled, idle temperatures exceeded 80°C. Once enabled, idle temperatures dropped to the 40°C range and stayed below 60°C under load during a five-minute stress test.
While the fan is not excessively loud, it is noticeable in a quiet room, and the lack of adjustable fan speeds is a missed opportunity.
Interestingly, using passive heatsinks without the fan proved to be a viable alternative. During normal usage like video playback, temperatures stayed in the 70°C range, and even under stress testing, the system approached 90°C without triggering CPU throttling.
Display and Audio Quality
The display quality is one of the Magex monitor’s stronger points. It includes manual RGB controls for color temperature, allowing you to fine-tune white balance rather than relying on preset modes. This level of control is uncommon in portable Pi displays and can help reduce eye strain during extended use.
Brightness levels are solid for indoor environments. While it doesn’t match the brightness of a MacBook, it remains clear and readable even in moderately lit rooms. Colors appear vibrant, and text is sharp.
Contrast performance is adequate, though blacks lean more toward dark gray rather than true black. Viewing angles are good head-on but lose some contrast when viewed from the side.
The dual speakers are suitable for casual media consumption like YouTube or music, though they won’t replace dedicated speakers.
Touch Input Experience
Touch functionality works out of the box, but the experience depends on your operating system. On Raspberry Pi OS Bookworm, basic touch works, but multitouch gestures like pinch-to-zoom and smooth scrolling are limited.
On Raspberry Pi OS Trixie, however, multitouch works significantly better. Scrolling, zooming, and general responsiveness feel much more natural, making it the better choice if you plan to rely on touch input.
Power and Connectivity
Despite using a 12V power adapter, the monitor internally converts power for the Raspberry Pi and supplies it through USB-C at approximately 5.28V. Total system power draw sits around 10 to 11 watts at idle.
The display can also function as a standalone monitor. It works well with devices like a MacBook over HDMI and automatically switches back to the Pi when disconnected. It can even be used with mobile devices over USB-C, adding to its versatility.
Usability Drawbacks
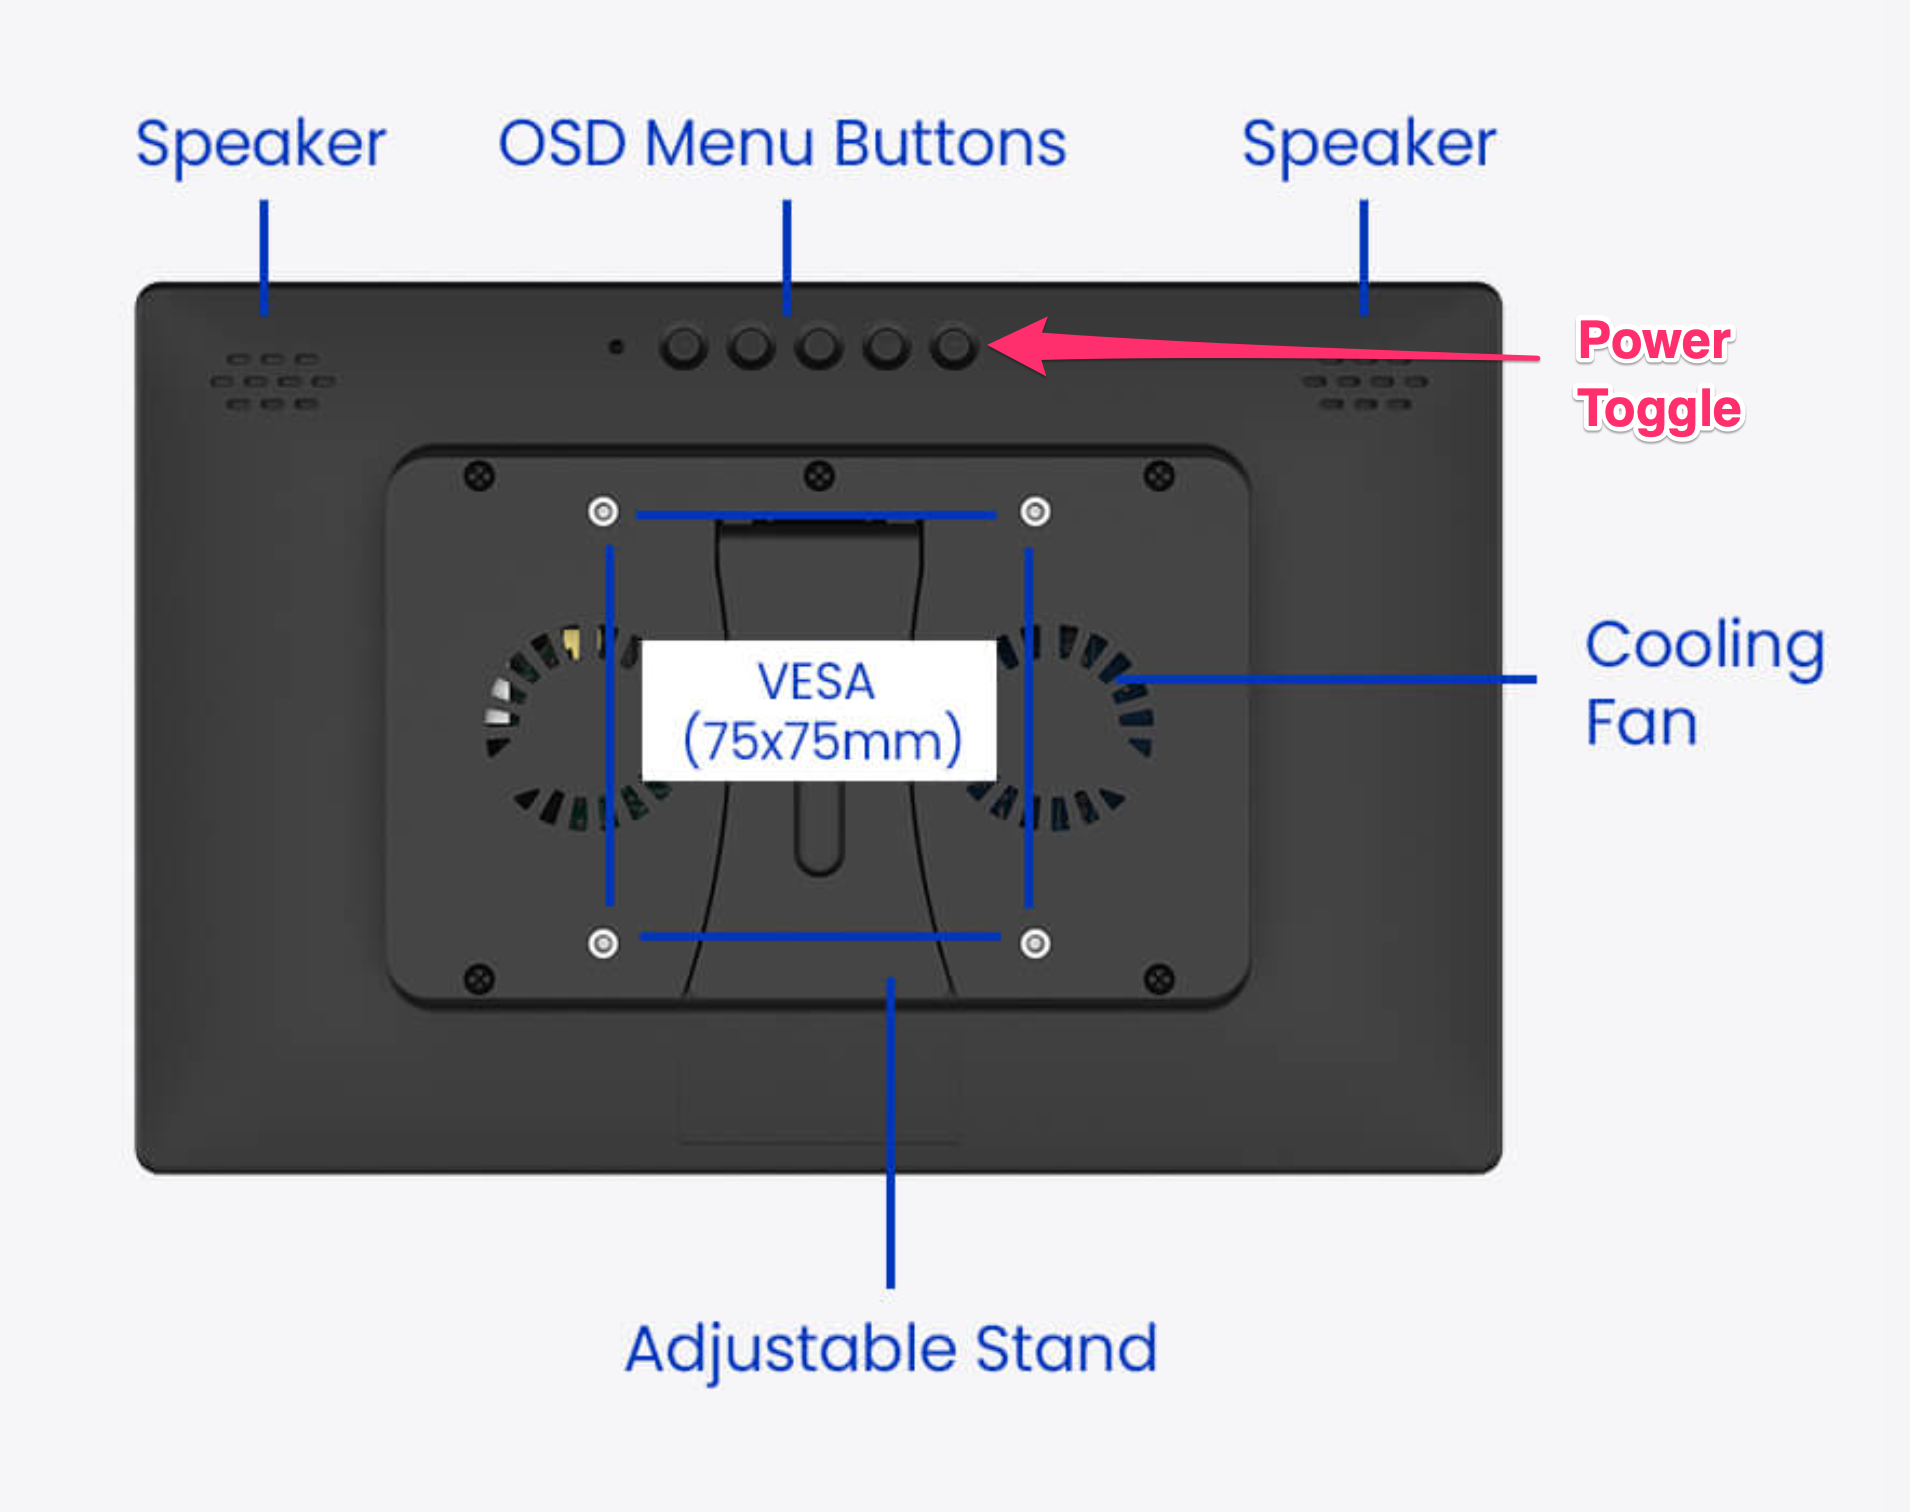
One notable issue is the power button behavior. Pressing the power toggle shuts down the Raspberry Pi immediately without warning. This can be problematic, especially since the button sits near other OSD controls, making accidental presses easy.
A configurable power button or a simple setup script would greatly improve the user experience here.
Final Thoughts
Overall, the Magex Raspberry Pi monitor delivers a strong all-in-one experience. It’s responsive, well-built, and offers excellent documentation and display quality. While installation takes some patience and accessibility is limited once assembled, the end result is a clean and compact setup.
This monitor is best suited for “set it and forget it” projects such as Home Assistant dashboards, wall-mounted displays, kiosks, or dedicated control panels. It also works well as a general-purpose secondary monitor.
Where it falls short is in flexibility. If your workflow involves frequent hardware changes or access to GPIO pins, this design may feel restrictive.
So If you’re looking for a polished, all-in-one Raspberry Pi display that minimizes cable clutter and delivers solid performance, the Magex is a compelling option. It’s not perfect, but for the right use case, it strikes a strong balance between convenience and capability.
If you found this breakdown helpful, feel free to explore more of my content for Raspberry Pi and homelab setups.