I honestly didn’t know what to expect from the ZimaBoard 2. After a week of testing, one question kept coming up: could this actually replace one of my servers? And the timing worked out pretty well for me, because I’ve been planning to add another Proxmox node to my setup. So this felt like the perfect opportunity to see if the ZimaBoard 2 could handle a few virtual machines—or maybe even serve as a dedicated Docker host using ZimaOS.
Transparency and First Impressions
For transparency, IceWhale sent over this review kit along with a few accessories. No money changed hands, and as always, they didn’t get to influence this content in any way.
Right out of the box, the packaging stood out. Instead of foam or plastic inserts, IceWhale uses a layered corrugated cardboard design. With a small modification, that packaging can even be turned into a dock for the board and a couple of SSDs. It’s a small detail, but it sets the tone for a product that feels a bit different from typical hardware.
What is the ZimaBoard 2 ?
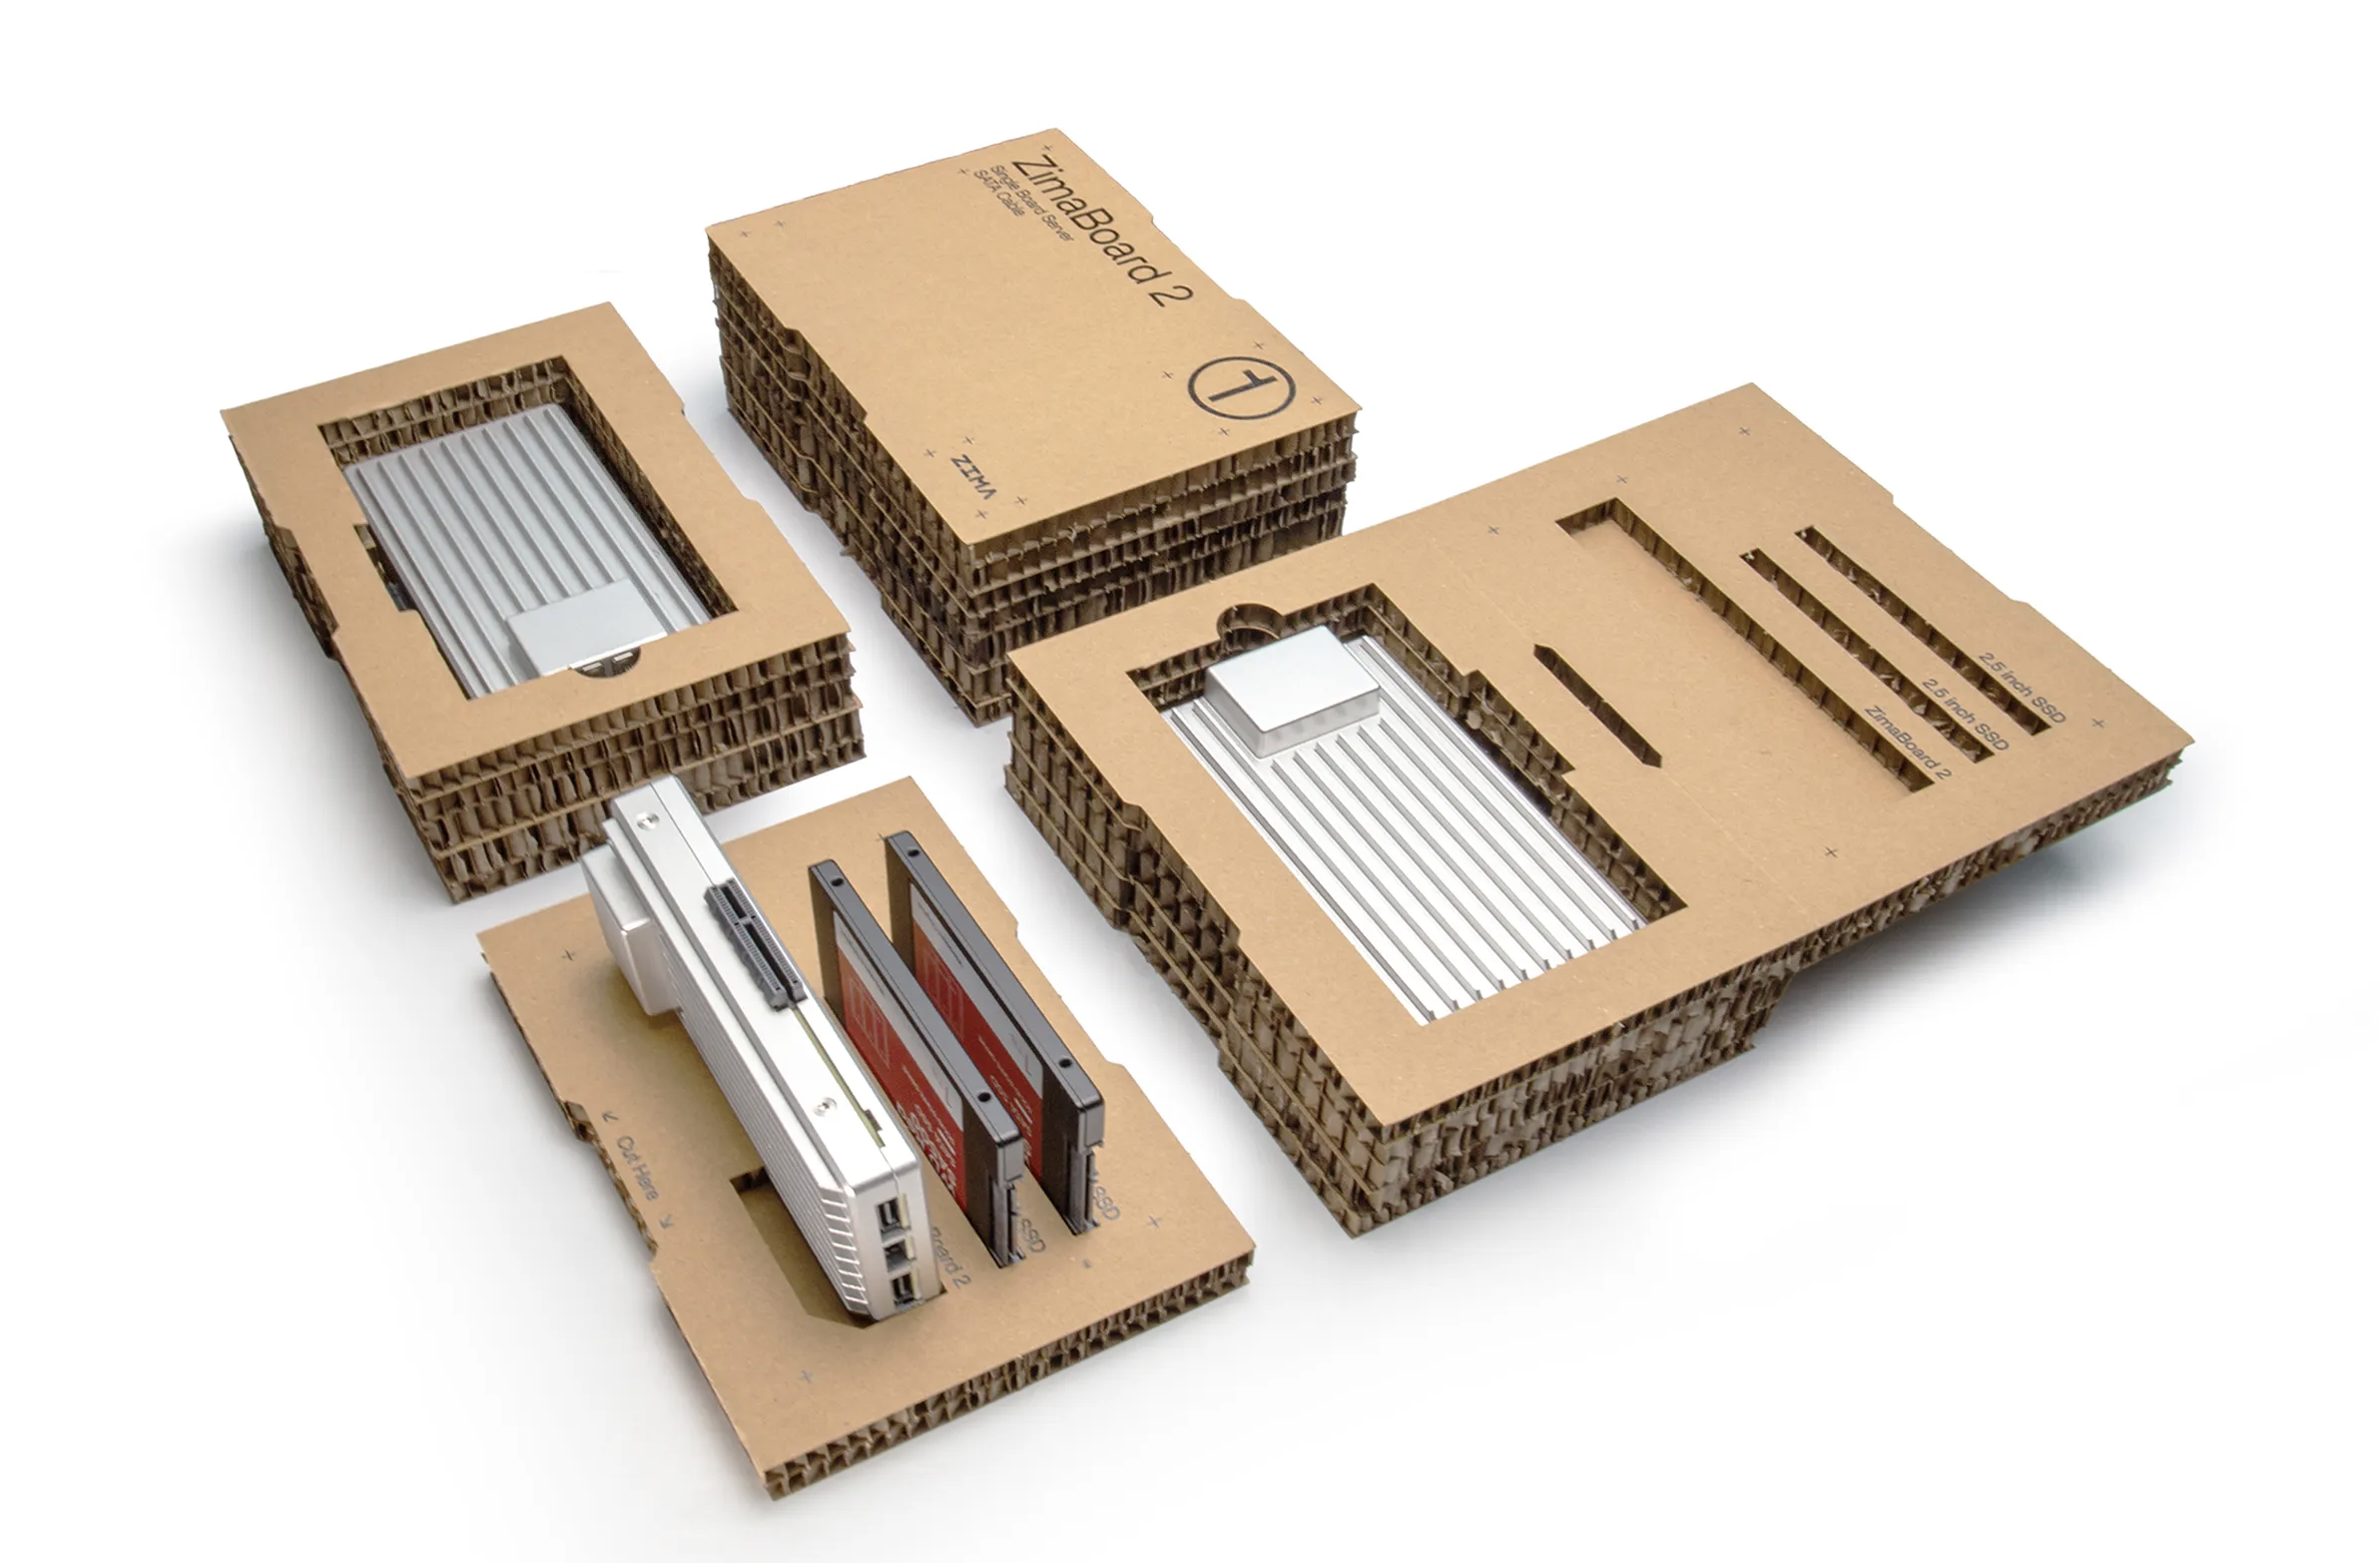
If you haven’t seen one before, the ZimaBoard is kind of what you’d get if you crossed a Raspberry Pi with a server. It’s the size of a deck of cards, but it’s some good heft making it feel more substantial thanks to its all-aluminum enclosure.
It’s completely fanless out of the box, using its enclosure as a passive heatsink. In terms of connectivity, you get dual SATA connections, two 2.5Gb Ethernet ports, 2 x USB 3.0, a mini DisplayPort, and, interestingly a PCIe 3.0 slot, which opens the door for NVMe expansion or a fast ethernet card!
The unit I tested came with 16GB of RAM and 64GB of onboard eMMC storage, though there are lower-tier options available. At first glance, it’s clear this isn’t your average single-board computer—it’s something designed to sit somewhere between a lightweight server and a full NAS.
Where Zimaboard 2 Fits in the Zima Ecosystem
The ZimaBoard 2 sits right in the middle of IceWhale’s lineup. On one end, you have the original ZimaBoard and the ZimaBlade, which lean more toward experimentation and maker projects. On the other end, there’s the ZimaCube, which is positioned as a more complete NAS or home server solution.
This second-generation board builds on the original concept with faster RAM, improved networking, a newer CPU, and updated PCIe support. All of the boards ship with ZimaOS preinstalled, which makes getting started incredibly quick.
Setting Zima 2 Up as a NAS
Getting started was straightforward. I connected two 2TB drives using the included SATA Y-cable, mounted them into the drive bay, and powered everything on. Since the system is designed to run headless, I simply scanned my network, found the device, and jumped into the web interface.
Within ZimaOS, both drives were automatically detected. After a few clicks, I created a RAID 1 mirror—giving me redundancy without much effort.
The interface itself is clean and browser-based, with an app store that installs services as Docker containers. That means most applications can be deployed with a single click and remain isolated from the rest of the system.
ZimaOS: Simple, but With a Few Quirks
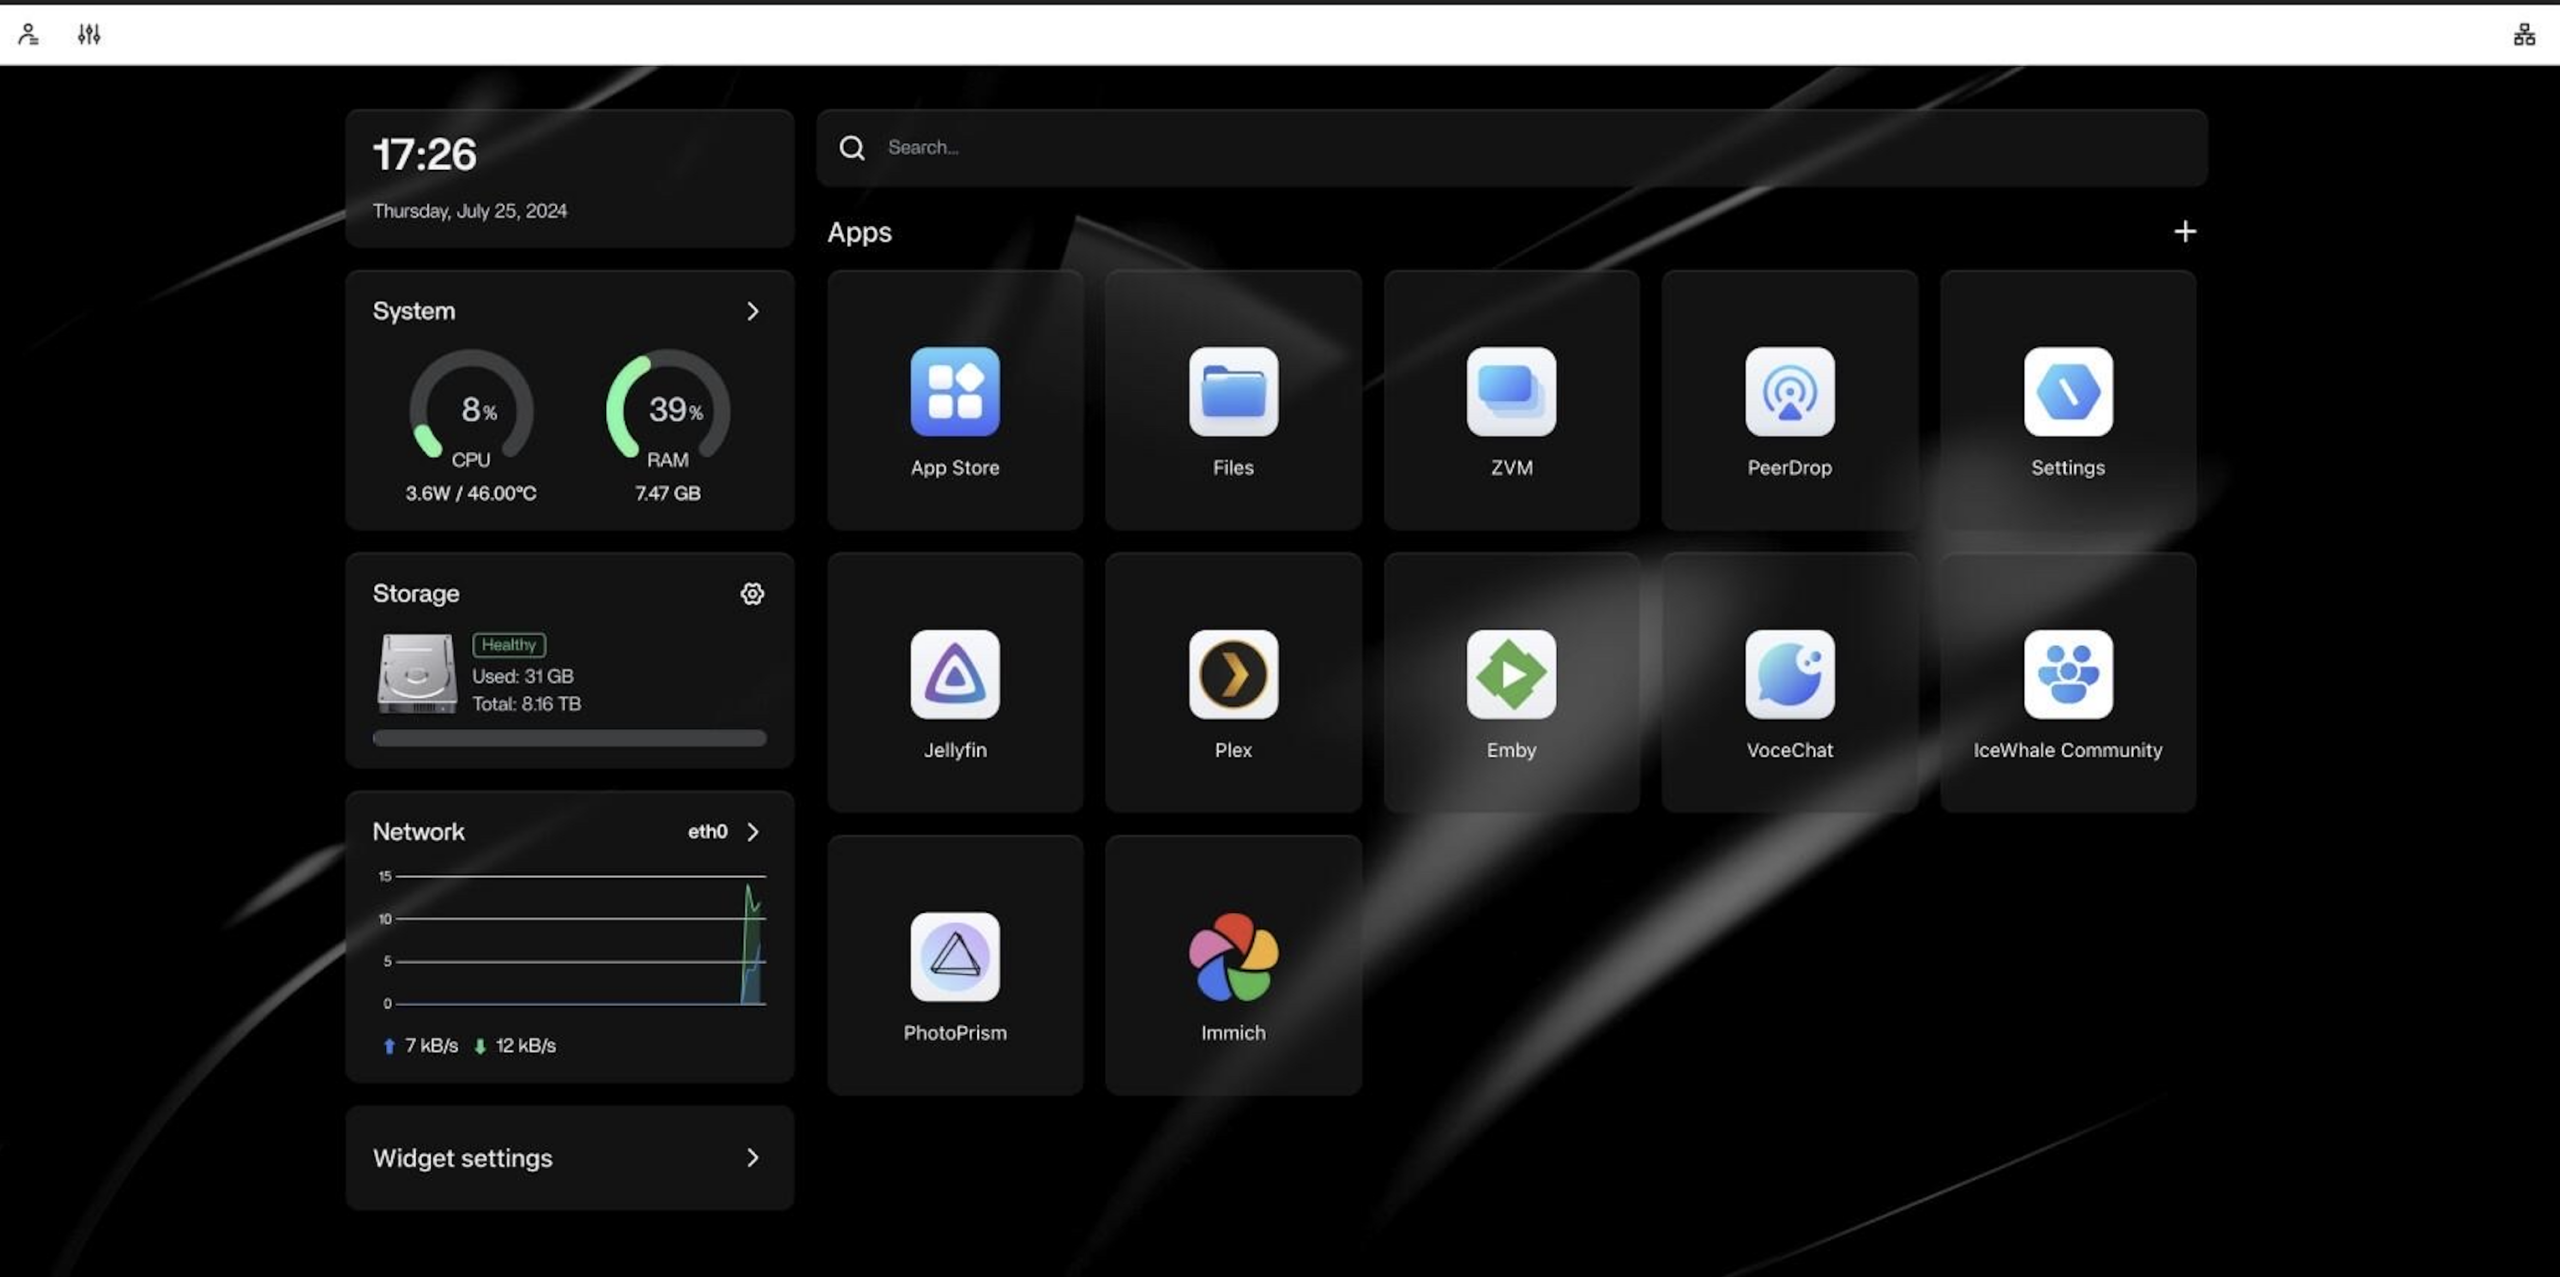
ZimaOS is essentially a customized version of CasaOS, and it does a great job of simplifying server management. You get a dashboard with widgets for storage, networking, and system stats, along with a built-in app store for deploying services.
Under the hood, everything runs on Docker, which keeps things modular and easy to manage. There’s even a built-in system monitor for checking resource usage in real time.
That said, a few things felt a bit hidden to me. Features like SMB, SSH, and HTTPS are tucked under “Developer Mode,” which feels like they should be more front-and-center given how commonly they’re used.
Still, once everything is configured, it’s a very approachable environment—especially for anyone new to self-hosting.
Real-World Performance and Power Efficiency
After setting everything up, I installed Jellyfin for media streaming, added a Linux Mint virtual machine, and ran multiple workloads simultaneously. Even with streaming across devices and a VM running in the background, the system remained surprisingly responsive.
Power consumption was one of the board’s biggest highlights. Under load, the system hovered around 26 to 27 watts. At idle, it dropped down to roughly 7 watts. That’s incredibly efficient, especially considering it was acting as both a NAS and a lightweight server.
Networking performance was equally impressive. Using a 2.5Gb connection, I was able to sustain speeds around 2.3Gbps—even while streaming and running a VM.
Thermals and Cooling
Thermal performance was solid for a fanless system. During stress testing, temperatures settled in the mid-80s Celsius, with occasional peaks into the low 90s. That might sound high, but it’s within safe operating limits for this type of design.
When I adding the optional fan, it brought temperatures down by about 10 degrees and helped prevent heat buildup during extended workloads. While the system runs fine without it, the fan adds a bit of extra headroom if you plan to push it harder.
Turning The Zima Board 2 Into a Proxmox Node
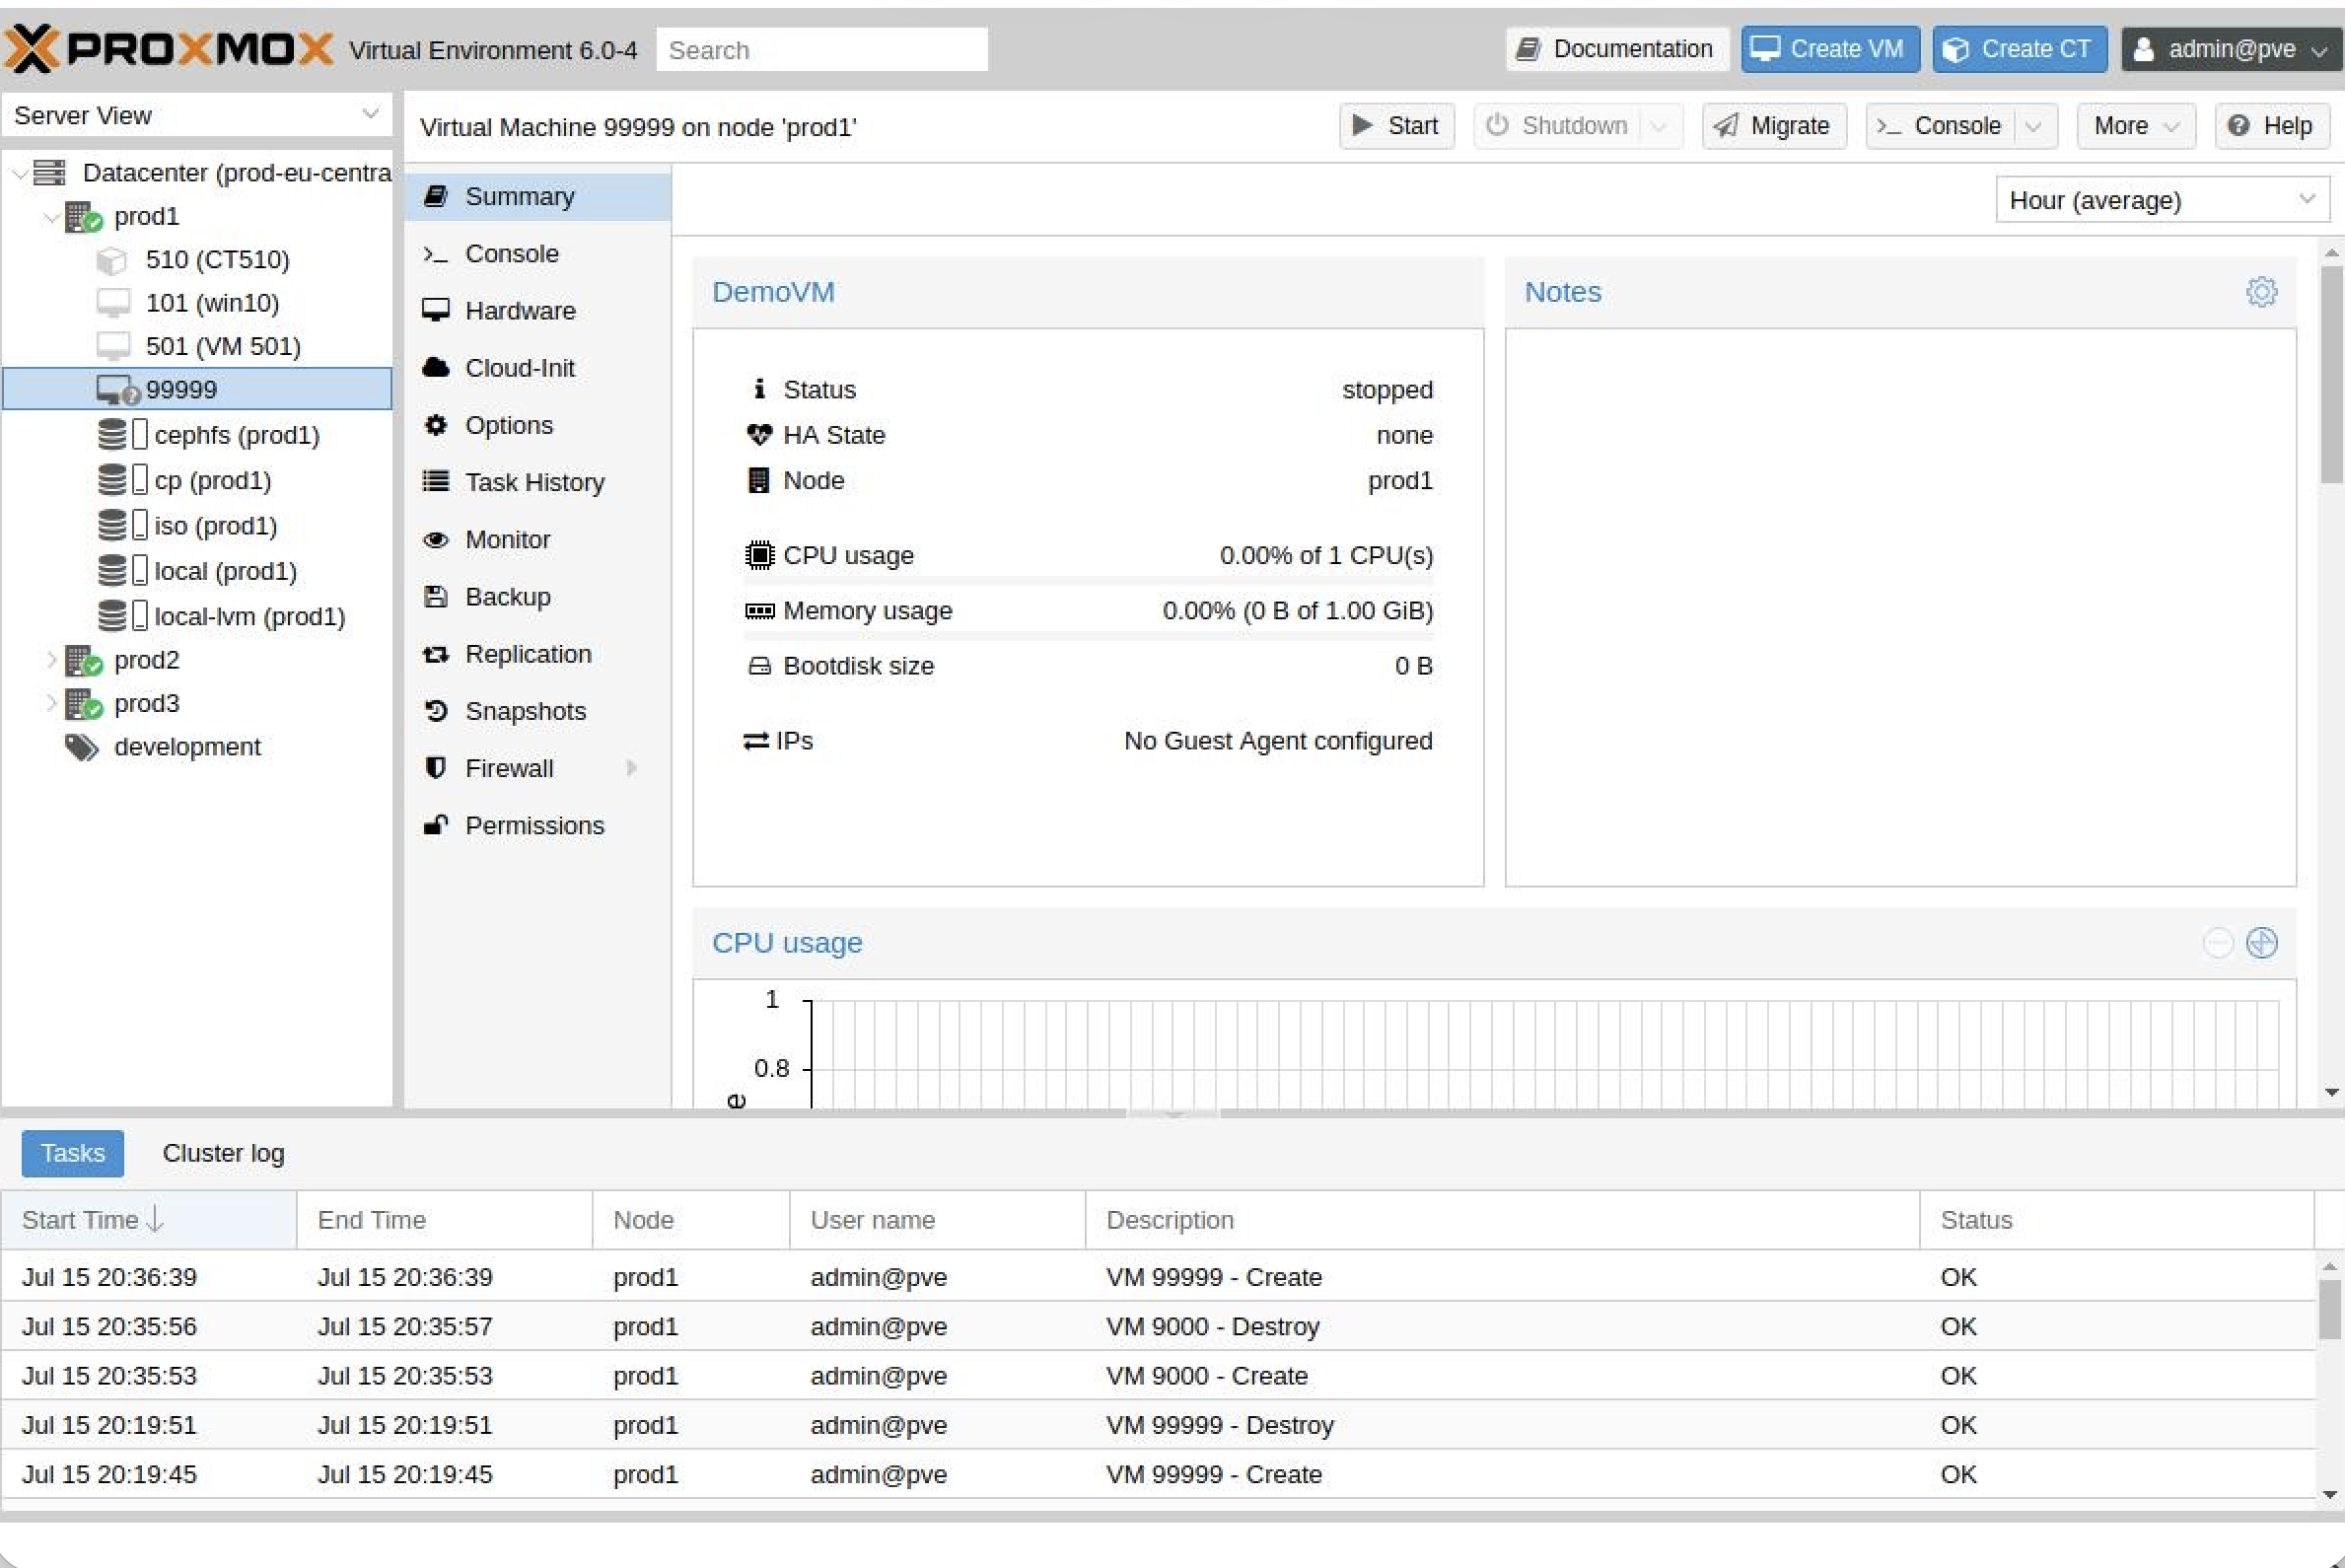
This is where things got really interesting. So, instead of replacing ZimaOS, I installed Proxmox onto an NVMe drive connected via the PCIe slot. The installation process was around seven minutes and once it was up and running, I configured additional storage and started deploying virtual machines.
I spun up Linux Mint, Zorin OS, and Home Assistant, and even ran updates across multiple VMs simultaneously. Despite allocating a large portion of the available RAM, the system handled everything without noticeable slowdowns.
At idle with multiple VMs running, power usage stayed in the 7 to 9 watt range, which is incredibly efficient for a virtualization host.
Storage Performance and Limitations
Storage performance scaled exactly as expected. The onboard eMMC is fine for the operating system but not ideal for heavy workloads. SATA SSDs provide a noticeable improvement, while NVMe delivers a massive jump in performance.
However, there is a limitation. The PCIe slot runs at Gen 3 x1, which caps total bandwidth. That means even though you can run multiple NVMe drives, they’re sharing that single lane. You still get improved performance, but not a linear increase.
Even with that limitation, NVMe storage still felt fast and responsive!
So Who Is the ZimaBoard 2 For?
The ZimaBoard 2 sits in an interesting middle ground. On one hand, ZimaOS makes it feel like a turnkey appliance. You can get up and running quickly without needing deep technical knowledge.
On the other hand, the hardware and expandability make it feel like something much more flexible. You can run Proxmox, experiment with Docker, and build out a variety of services.
There are a few quirks. Some features feel slightly hidden, and certain hardware configurations require more hands on. But once you get past that, the system really opens up.
Final Thoughts
After a week of testing, I honesly don’t see the ZimaBoard 2 replacing any of my servers.
However, what it does incredibly well is fill the gap between a single-board computer and a traditional server. It’s efficient, versatile, and surprisingly capable for its size.
It feels less like a fixed device and more like a platform you can grow into. Whether you’re offloading services, experimenting with VMs, or building a homelab, it just fits. Honestly, that’s what makes the Zima 2 so interesting!